How to Set up Your Mind That Job Settings
You can personalise your Mind That Workspace settings to tailor the experience to your needs and preferences. This includes customising the appearance of your interface, adding categories and organising tasks and projects in a way that makes sense to you. These personalisation options help to streamline the workflow and increase productivity.
How to Navigate to Job Settings
To start, you must log in to your Mind That account. For multiple accounts, make sure to log in to the proper account.
On the main navigation bar, move your cursor to the Company profile beside the Individual profile and notification bell. Click the company profile dropdown button, and a menu will appear.
Click the Settings button to redirect to the Workspace Settings page immediately.
Under General Settings are several personalisation options you can choose from and customise according to your company’s preference. The options include Settings, Users, Jobs, Documents and Qualifications, Templates and more. In this section, we focus on Job Settings.
Click on the “Jobs” button below the “Users” settings.
You will see three categories on the Navigation tab: Job Types, Priorities and Statuses. Clicking on any of these will allow you to manage and change these settings.
Customising Job Settings
Job Types
Job types denote the general group into which a job fits. You can create your company’s job types using the text fields, icons and buttons.
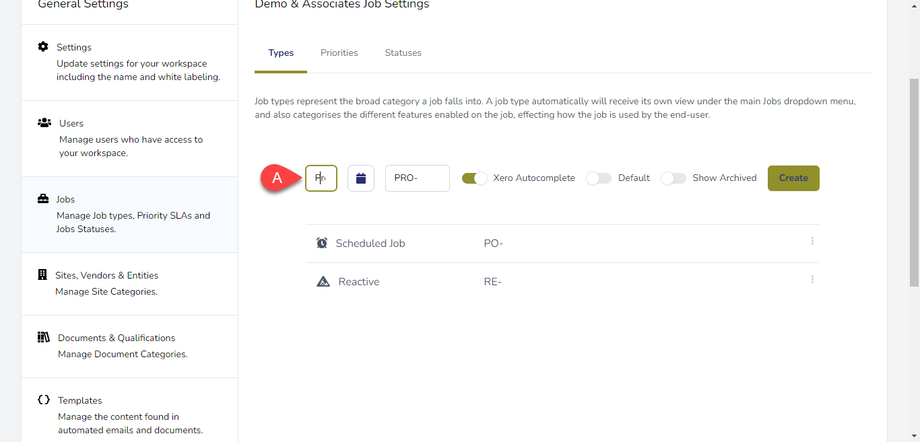
To begin, (a) assign a label to a particular job type you want to categorise. In the example above, we assign specific jobs to a project-based category. We’re typing in “Project” on the label text field.
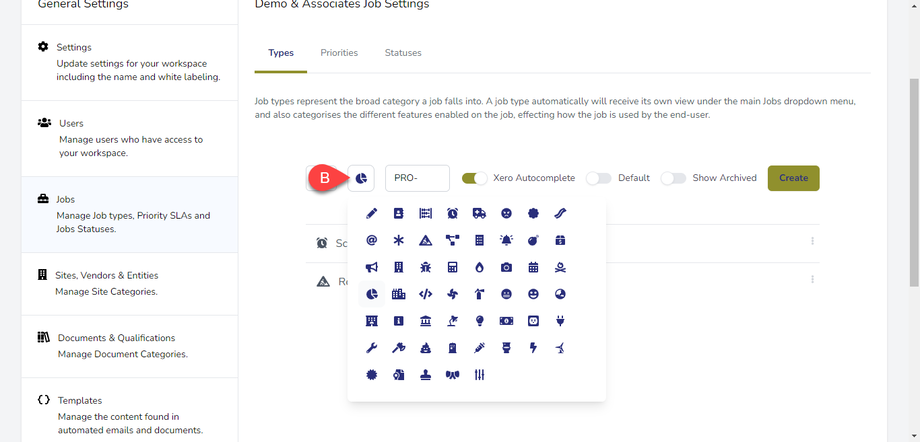
Next, you can assign a symbol/icon representing that job category. (b) Click on the Icon button beside the Label text field. This will show you several icons and symbols you can use. In this example, we use a Pie Chart Symbol to represent “Projects.”
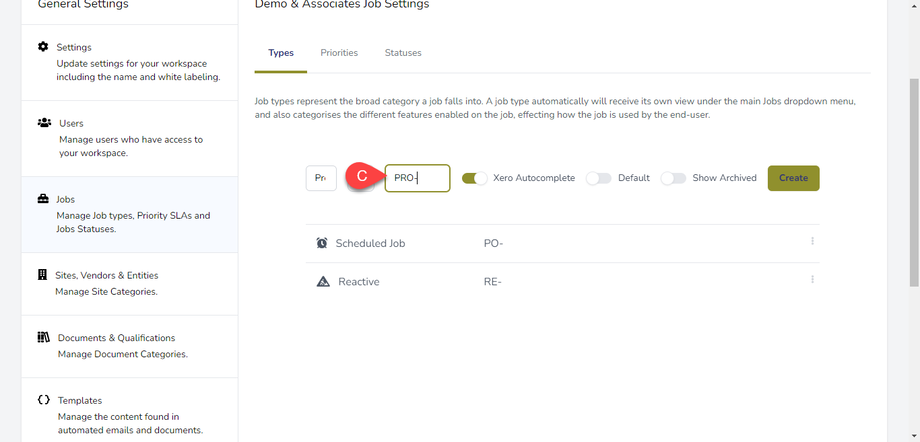
The following field (c) assigns a Prefix to the job type, which comes before the Job order number. For example, if we assign a PRO- prefix to jobs under this category, the job number will look like PRO-00001. All jobs under that category will have the same prefix.
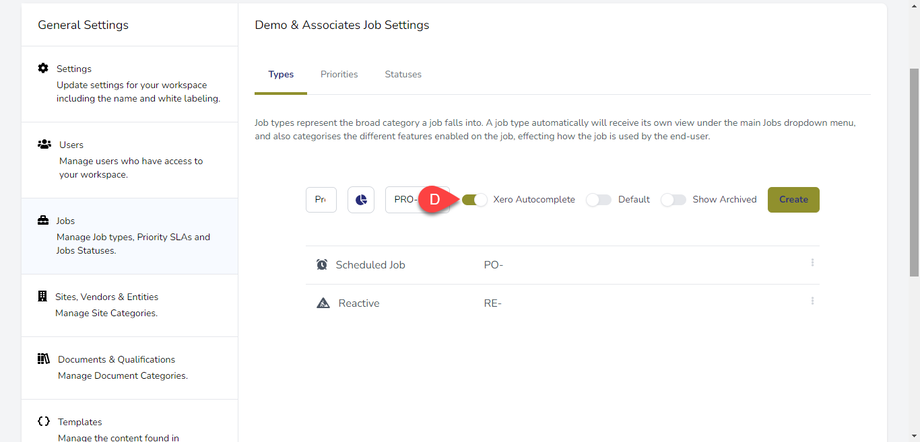
Toggling on (d), the Xero Autocomplete button will select which work orders are automatically completed by job type when the system automatically matches with a Xero bill.
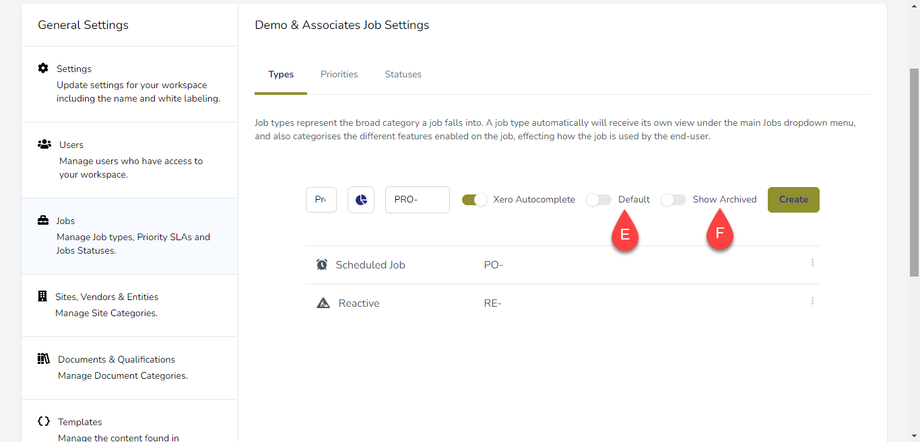
You can (e) also toggle on/off the Default button to denote if these are default job types (see linked documentation for more info). There is also (f) an option to show archived jobs by toggling on/off the “Show Archived” button.
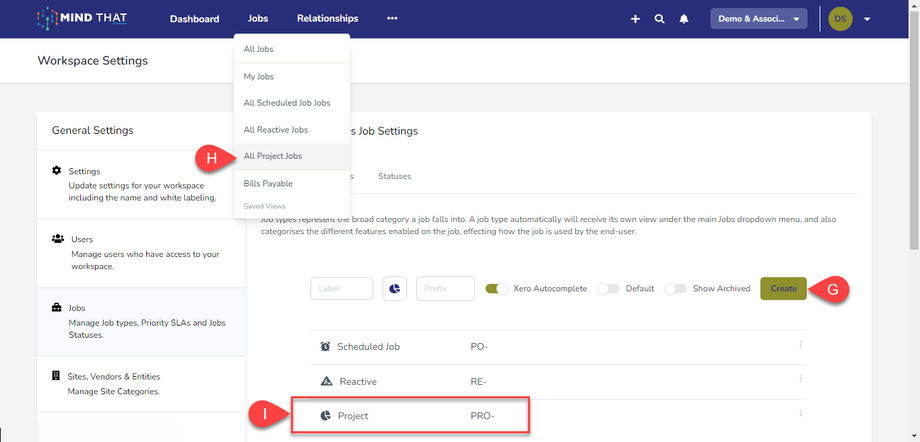
Once satisfied with the new job type category, click (g) the “Create” button.
This will automatically (h) create a new option on the main Jobs dropdown menu, as shown in the example above. You can also (i) see the new job type on the list.
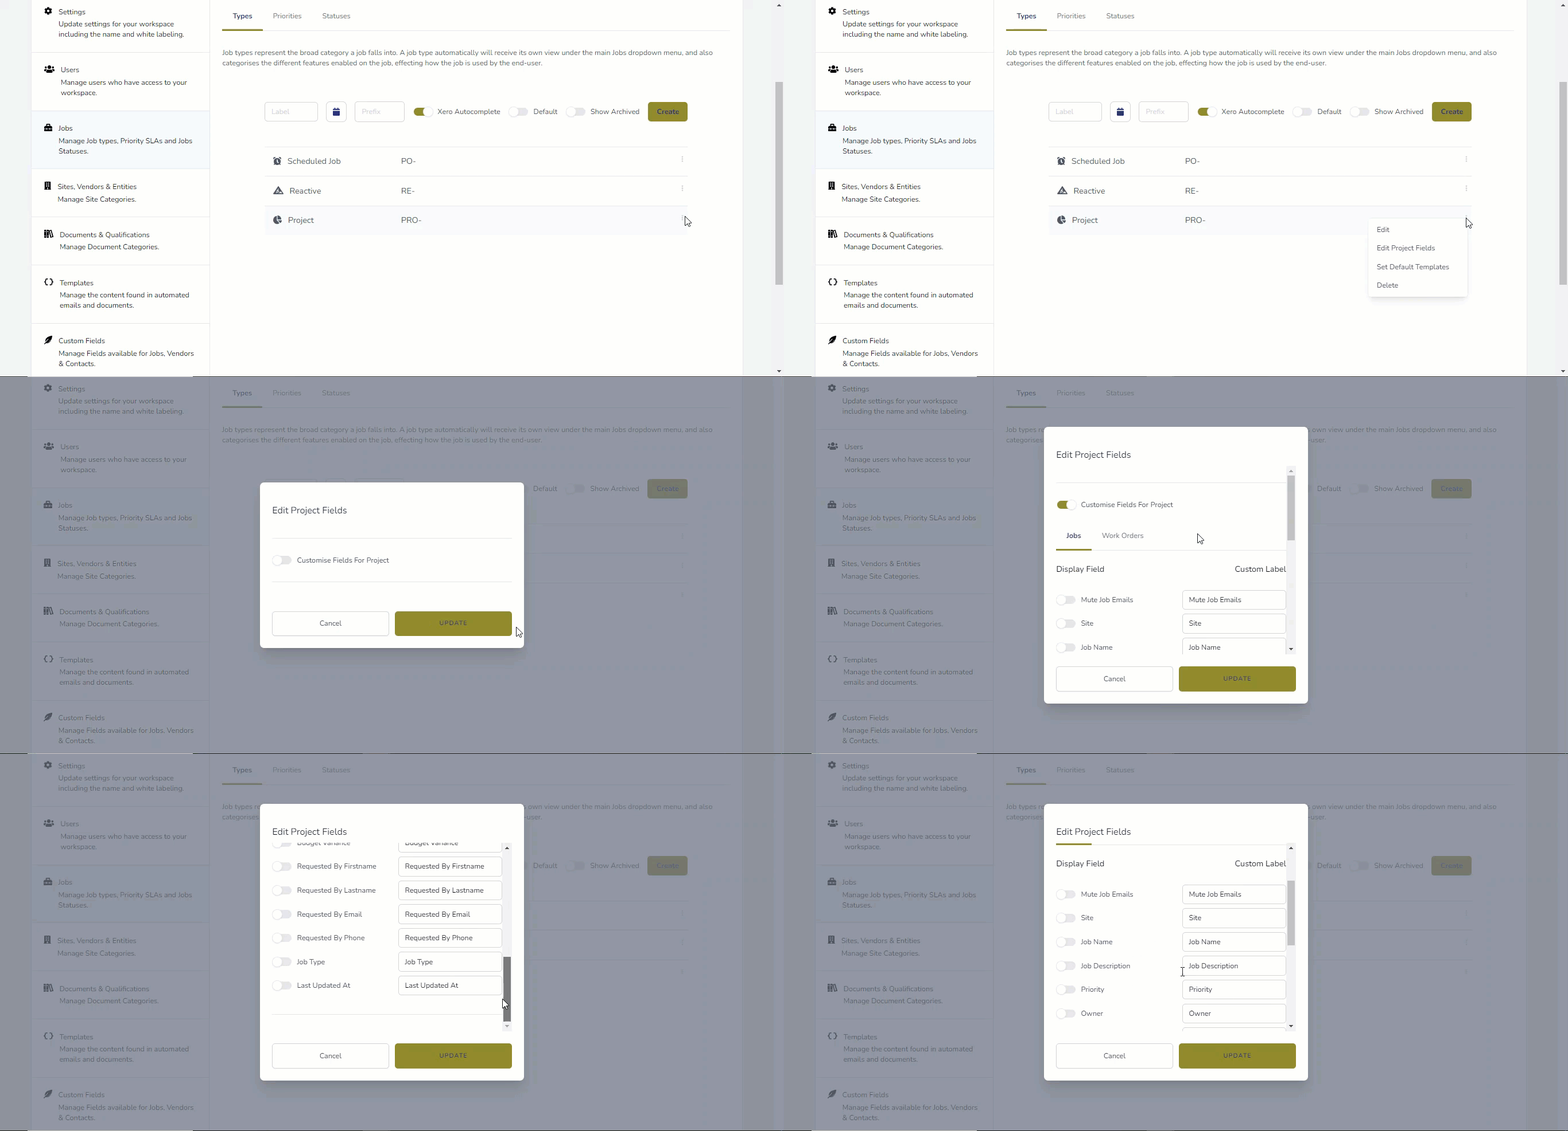
You can also customise fields, as shown in the image above. Learn more about Custom Fields in a separate tutorial.
Priorities Settings
Priorities enable you to specify the significance of a job and the desired service level agreements. You can color-code each job priority label to designate its importance and for easier filtering, sorting, and reporting.
To begin, (a) assign a Priority Label on the designated text field. You can type in any priority label if it fits the job designation. In this example, we’ll input Routine.
Next, you can (b) choose the color to designate the priority label. A color gradient tool is available when you click on the Color button. We’re choosing light green in this example to designate Routine Priorities.
You can (c) assign a number and a unit to measure the priority level of a job. The units range from minutes to years, depending on what applies to the particular job.
Once everything is set, you can (d) click the “Create” button. The new job priority category should appear on the list.
You can (e) edit the Statuses anytime by clicking on the 🖊️ icon. You can also delete the Status by clicking on the 🗑️ icon. When done, click on the “Save” button.
Status Settings
Statuses represent the current stage of a job. Status is used to trigger specific workflows or provide exceptions to jobs.
To create a Status, (a) type in a Status Name in the designated text field. In this example, we’re making a Status for Cancelled jobs.
Toggling the “Closed” button (b) means the job is automatically closed when assigning this particular status.
You can (c) show the job on the job board when toggling on the “Show on board” status.
When everything is set, you (d) can click “Create, " which should appear on the Status list.
You can (e) arrange the logical order of these statuses by hovering your mouse cursor on the two horizontal lines before the Status Name. A crosshair will appear, allowing you to drag and drop the statuses to your desired order. In this example, we moved Cancelled to the top of the list.
You can (f) edit the Statuses anytime by clicking on the 🖊️ icon. You can also delete the Status by clicking on the 🗑️ icon.


