How to Manage Users in Your Mind That Account
Your Mind That account can have multiple users, and it’s essential to assign specific access levels to each user based on their roles and responsibilities within the organization or team. Setting appropriate access levels in Mind That helps ensure that users can only access the information and resources they need to perform their job functions while safeguarding sensitive data from unauthorized access.
This guide will teach you how to manage users to help streamline workflows and improve efficiency.
How to Navigate to Workspace Setting
To start, you must log in to your Mind That account. For multiple accounts, make sure to log in to the proper account.
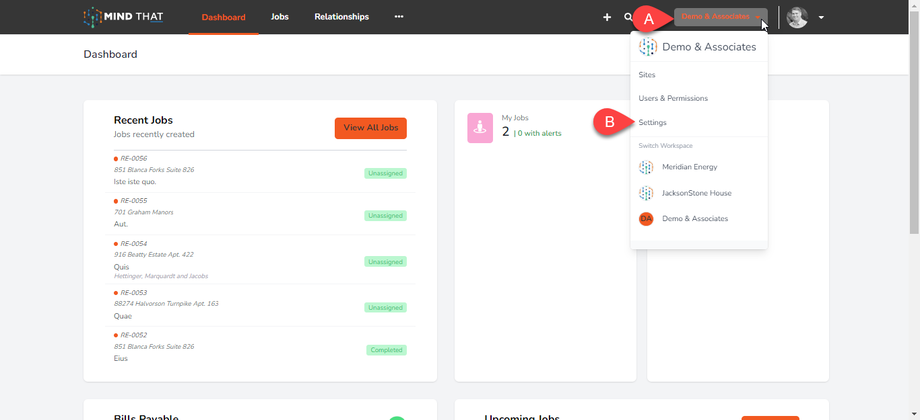
On the main navigation bar, (a) move your cursor to the Company profile beside the Individual profile and notification bell. Click the company profile dropdown button, and a menu will appear.
Click the Settings button (b) to redirect to the Workspace Settings page immediately.
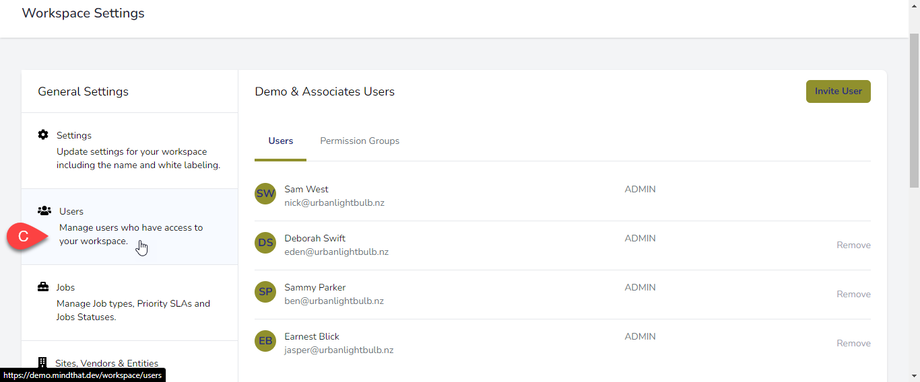
On the Workspace Settings page, click (c) the User tab on the left sidebar.
User Settings
Inviting Users
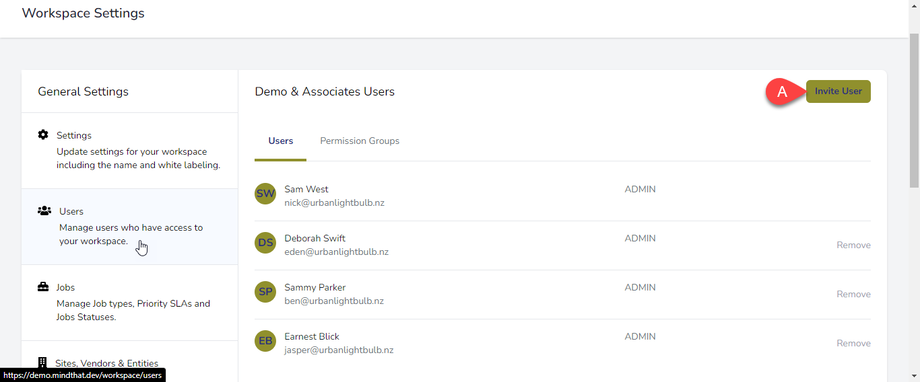
To start managing users, you can invite certain entities, vendors and users to your workspace. To do this, (a) click the “Invite User” button on the upper right side of the page.
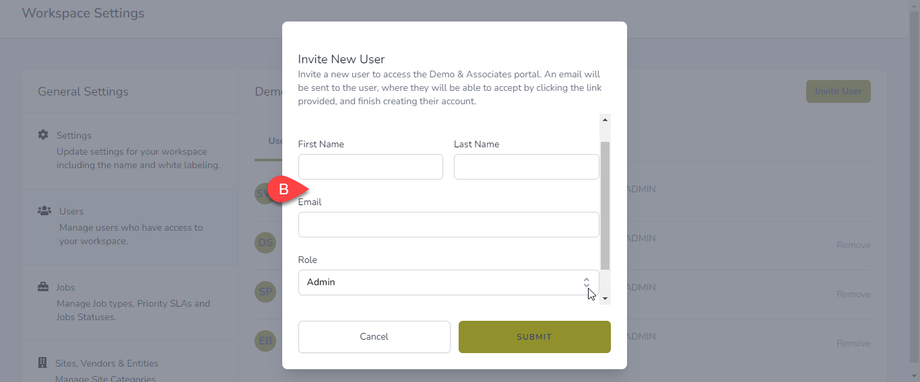
A (b) new dialogue box will appear with text fields. You can input the name and email of the user and assign a role. 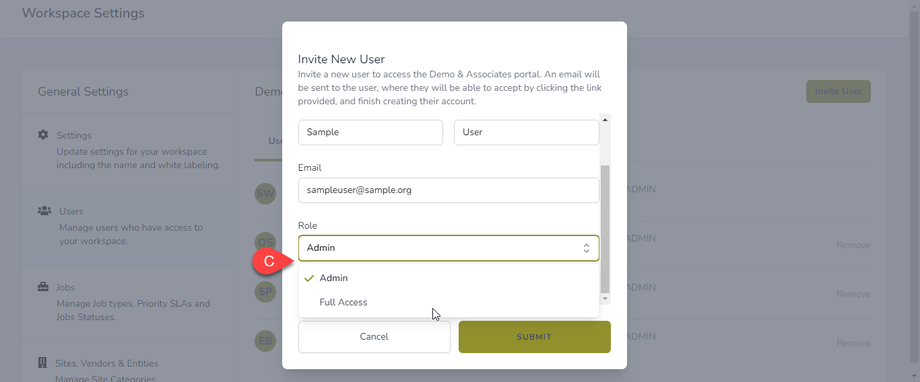
To assign a role, (c) click the Ascending/Descending button to reveal the options. Providing Admin access means the user can access the full suite of features, information and data for a workspace. On the other hand, providing Full Access means the user can access the full suite of features, information and data for all workspaces included in the account.
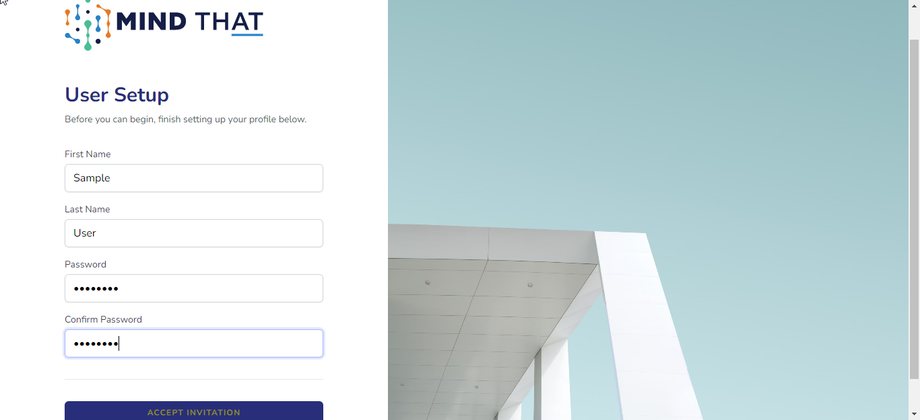
Once the user receives the invitation email, (d) they will copy the URL and paste it into the web browser as shown in the image above.
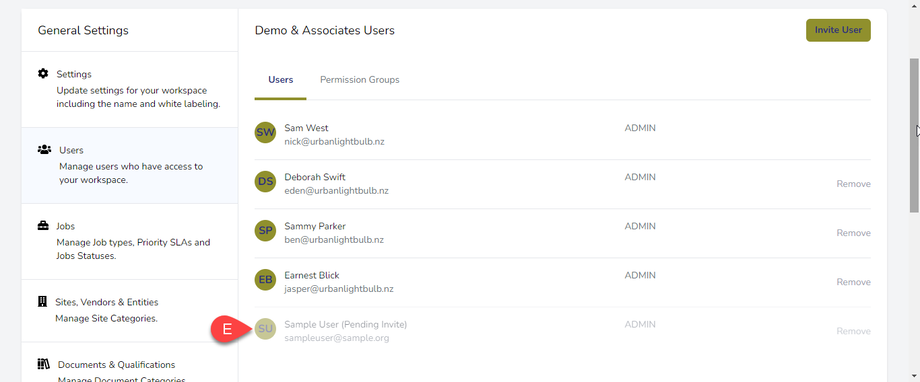
On the User Settings page, (e) pending invites will show up on the list.
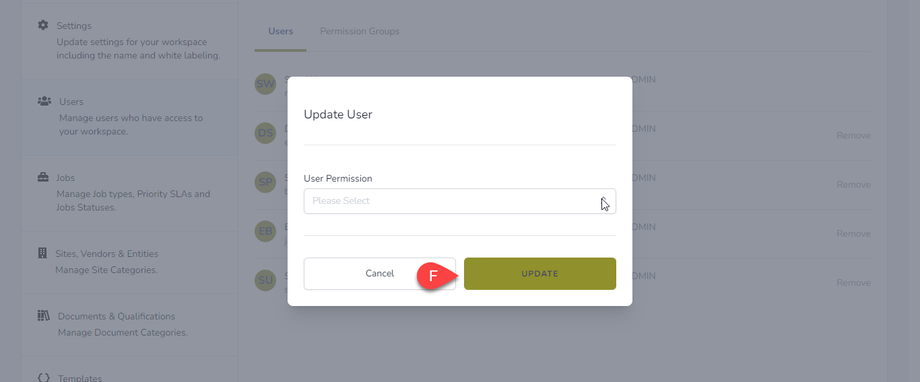
Once the User has accepted the invite, the pending invite highlight will disappear, and you can assign or update the role anytime by clicking on the assigned role. A new dialogue box will appear, asking you to update.


