How to Manage User Permissions in Your Mind That Account
This guide serves as an extension of the managing users' documentation. User permissions will allow certain users and entities controlled access to the information and features present on the Mind That application.
How to Navigate to Workspace Setting
To start, you must log in to your Mind That account. For multiple accounts, make sure to log in to the proper account.
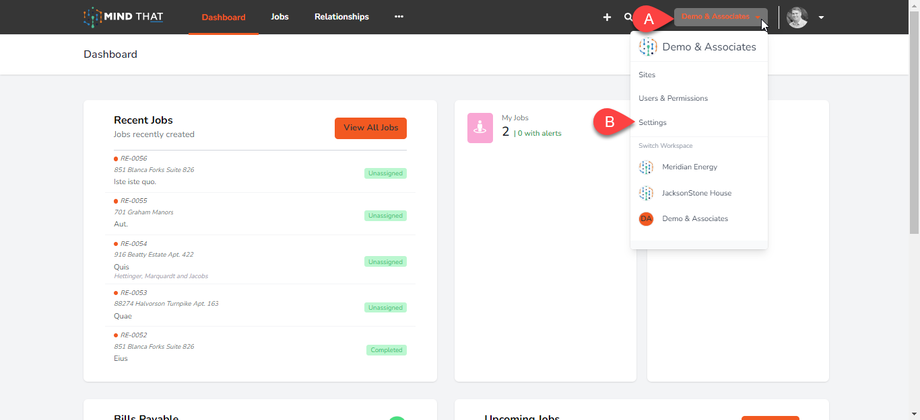
On the main navigation bar, (a) move your cursor to the Company profile beside the Individual profile and notification bell. Click the company profile dropdown button, and a menu will appear.
Click the Settings button (b) to immediately redirect to the Workspace Settings page.
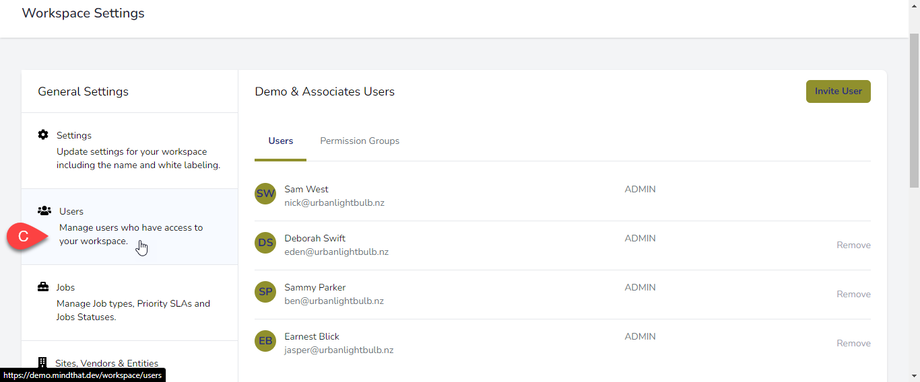
On the Workspace Settings page, click (c) the User tab on the left sidebar and click the Permission Groups tab.
User Permissions
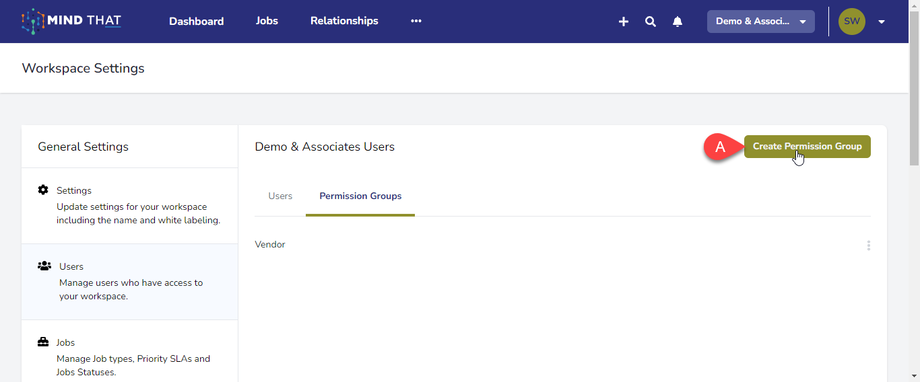
Click (a) the "Create Permission Group" button to create new user permissions.
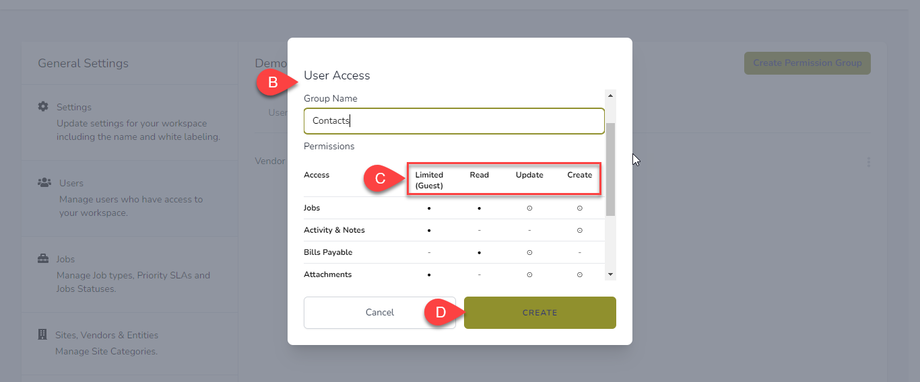
A new dialogue box (b) will appear with a table of permissions for specific information tabs, such as Jobs, Activity, Bills Payable, Attachments, Documents, and more which you can toggle on/off depending on the level of access.
You can assign multiple tabs/categories that apply to a particular user. For example, you can only set the Job category to a user. As for the level of access, (c) you can choose from four: Limited (Guest), Read, Update, and Create.
Similarly, you can assign different access levels to users for particular tabs or categories. For example, you can give a user limited access to Jobs but allow that user full access to Sites (e.g., read, update and create).
When done assigning the user permissions, (d) click the "Create" button.
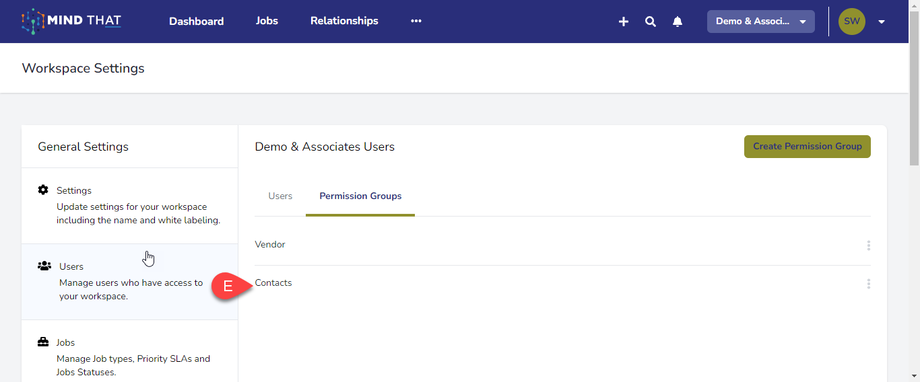
You will (e) see the new user permission on the list, as shown here.
Editing and Deleting User Permissions
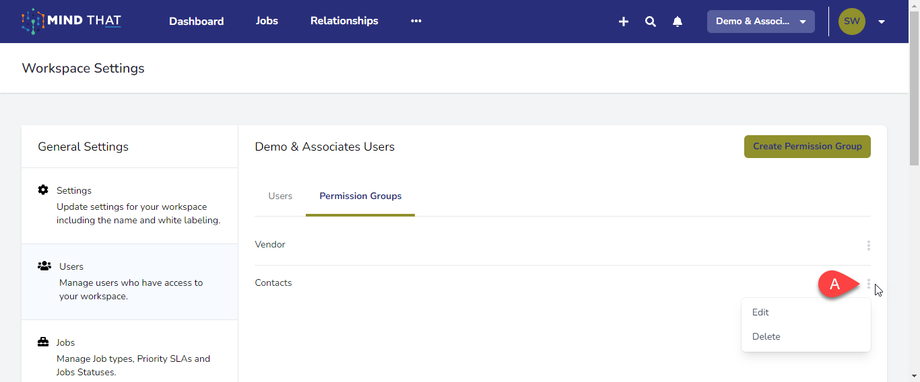
You can (a) also update existing user permissions by clicking the kebab button on the rightmost side of the list. A dropdown menu will appear, showing the Edit and Delete options. 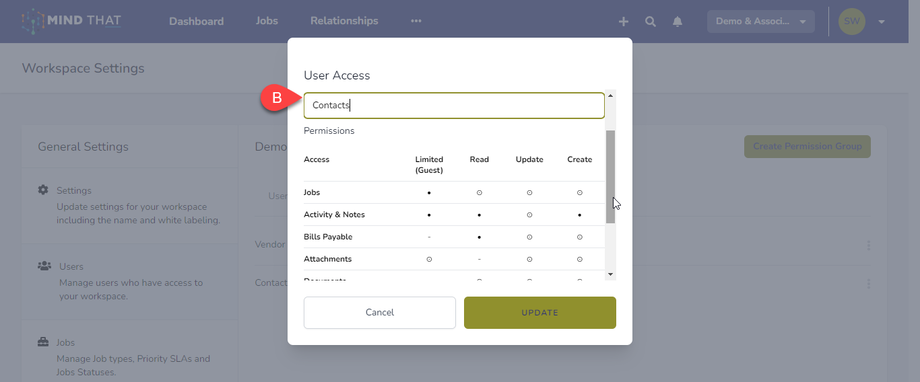
When (b) clicking the Edit button, a dialogue box will appear similar to the Create Permission Group dialogue box, which shows all the permissions and access levels. The only significant difference is the "Update" button instead of the "Create" button.
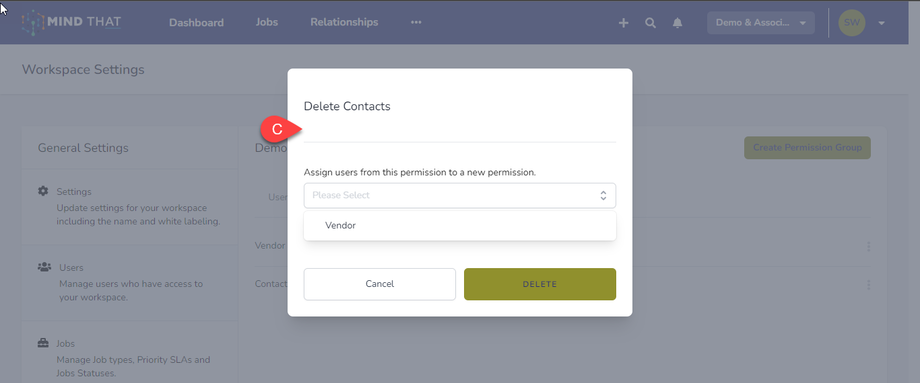
On the other hand, when (c) clicking on the Delete button, a new dialogue box will appear, which will prompt you to transfer all users with that permission to another existing permission.
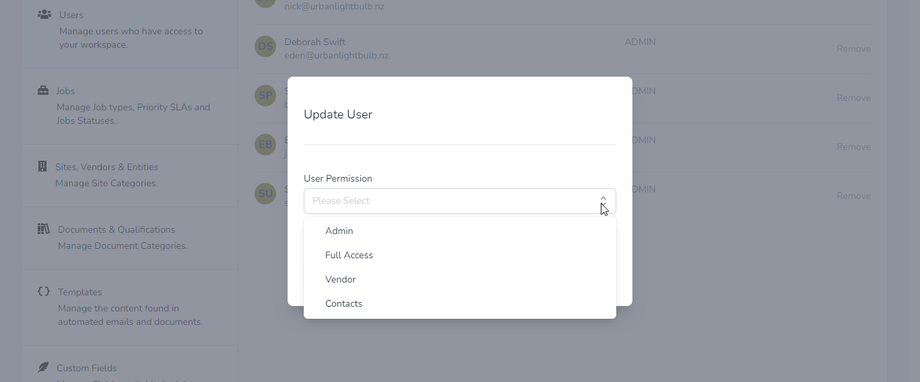
On the User tab, you can now assign new user permissions to your users, as shown in the image above.


