How to Create Jobs using Mind That as a User
If you’re a Mind That user, you may already know that it’s a solid and effective management tool to help you be efficient and productive. This tutorial will take you step by step through generating jobs in Mind That.
How to Create a Job
Creating a job as a user is relatively simple, but first, you need to customise a few other things in your company’s workplace settings to ensure that they meet the information requirements when creating a job.
To do this, you can change the Job settings and customise the Job Types, Priorities and Status to create your custom workflow. To see a tutorial on how to set up your Mind That Job Settings, click this link.
Creating a New Job as a User
Once satisfied with the fields and the pertinent information, you can create or add a new job. To begin, (a) move your cursor to the main navigation bar and click the “+” button.
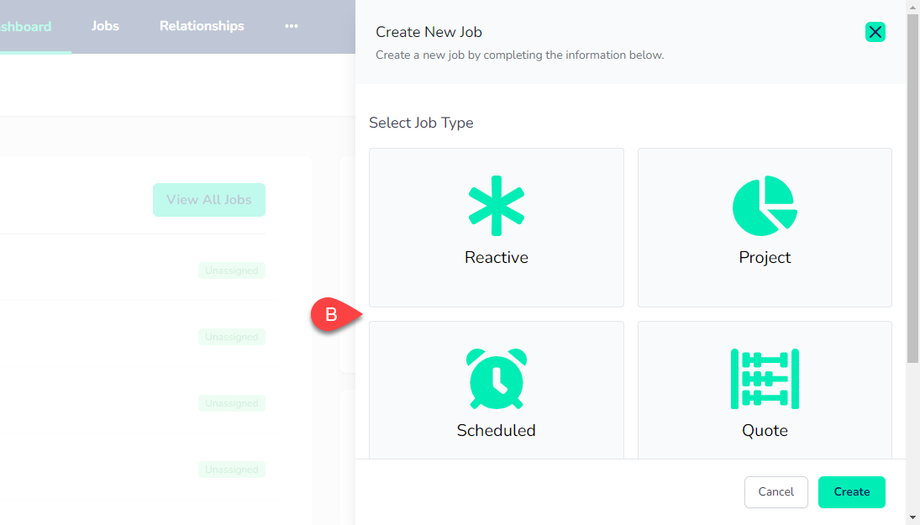
When you click the “+” button, (b) a sidebar will appear, prompting you to choose a Job Type. As a side note, the Job Types shown here are customisable in the Job Settings section. See the Job Settings tutorial on how to do this.
Choosing a job type will (c) redirect you to the Entry Form. In this example, we’ve chosen the Reactive Job type. You will see all the custom fields you’ve created on the Workspace Settings. Once all the essential fields are filled in, (d) click “Create” to generate a new job.
Once you click “Create,” (e) you will be redirected to a new page showcasing the summary form and other relevant information about the new job.


