How to Include and Inform Inductions in Your Sites
Inductions are relevant in Mind That since they’re a way to inform vendors and entities of what to expect in a job site or work order. Before accepting a work order, these inductions also gauge contractors' and entities' qualifications, training, etc. Let’s look at the tutorial on how to include inductions in your sites.
How to Navigate to Site Settings
To start, you must log in to your Mind That account. For multiple accounts, make sure to log in to the proper account.
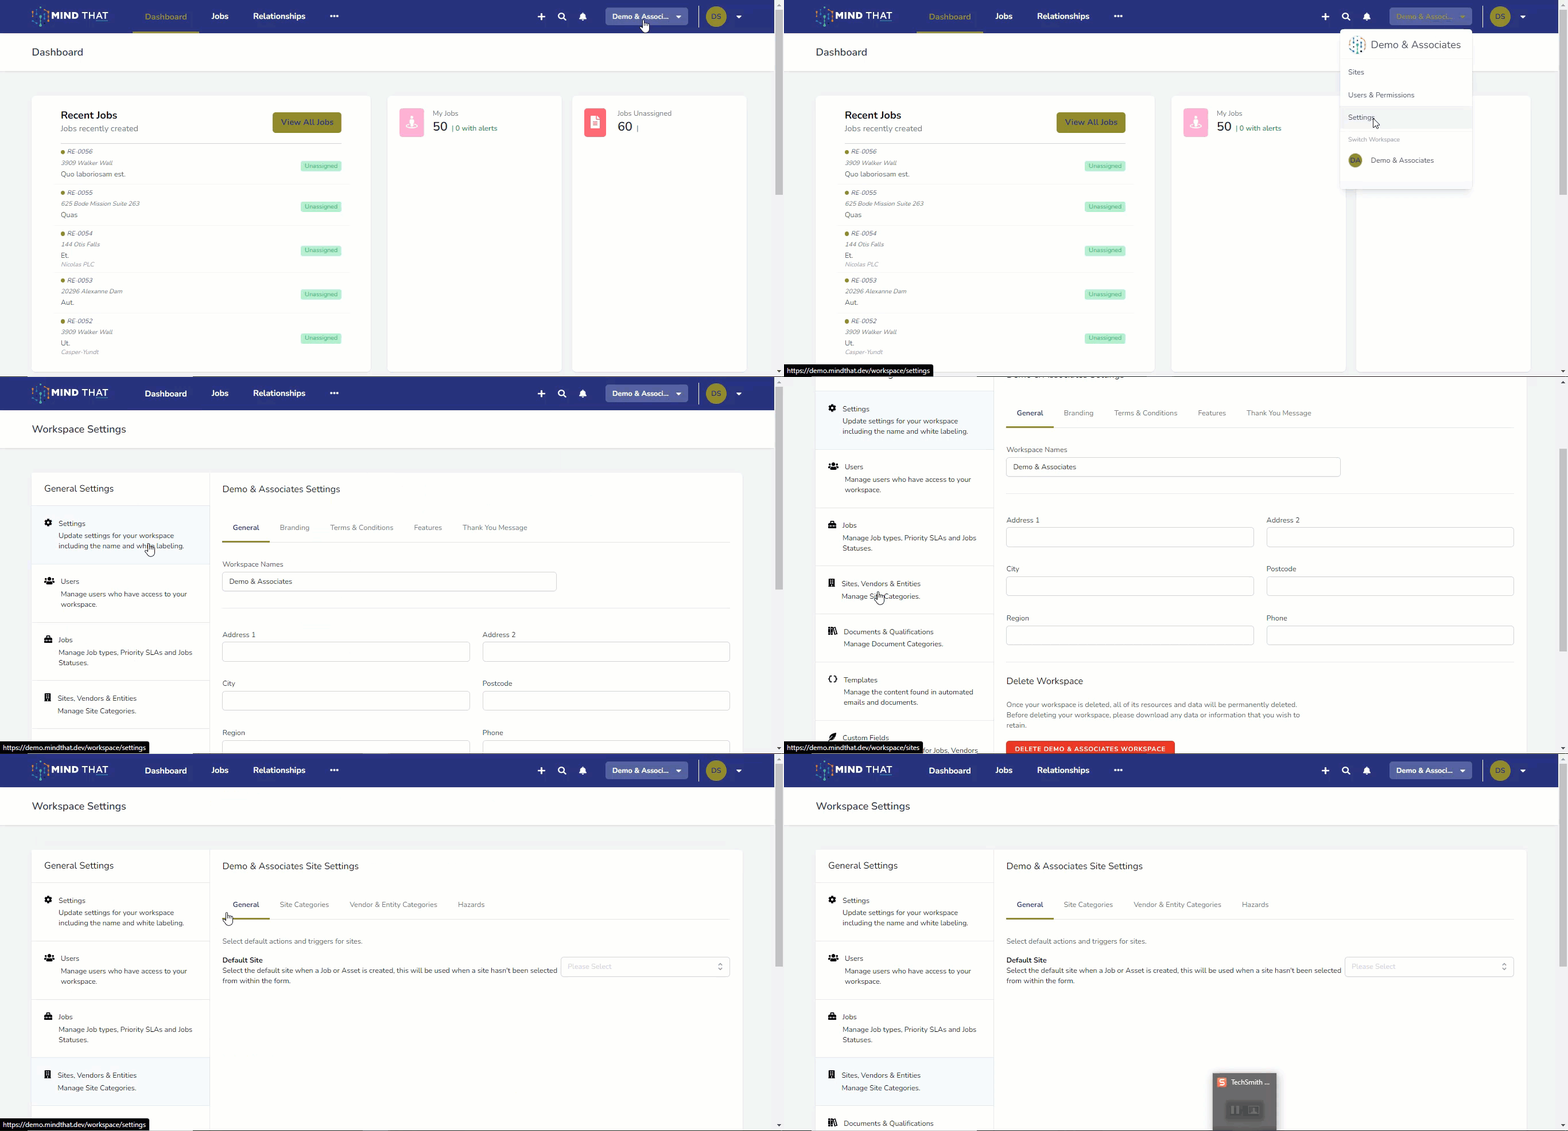
Move your cursor to the Company profile beside the Individual profile and notification bell on the main navigation bar. Click the company profile dropdown button, and a menu will appear.
Click the Settings button to redirect to the Workspace Settings page immediately.
Under General Settings are several customisation options you can choose from and change according to your company’s preference. The options include Settings, Users, Jobs, Sites, Vendors and Entities, and more. We’re going to focus on the Documents and Qualifications section.
Click the Documents and Qualification section to redirect you to that section.
Documents and Qualifications Categories
Whilst not directly involved in adding inductions, documents and qualifications categories are essential because this is where some of the documentation and requirements will be categorised for new inductees to read and learn more about the site, hazards, etc.
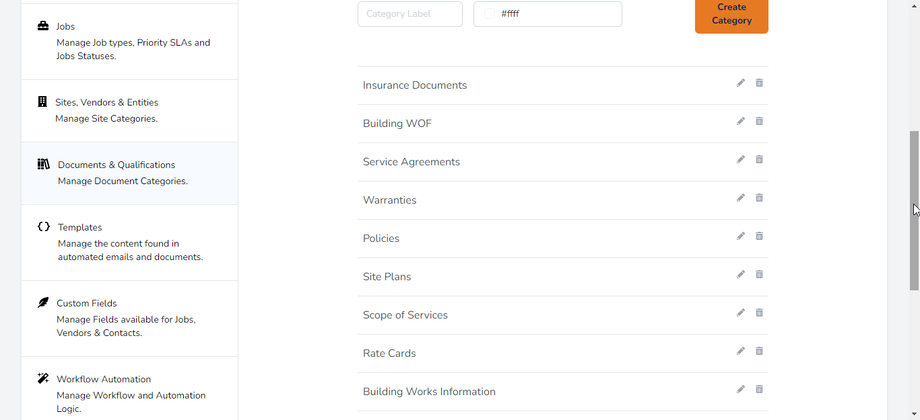 As shown in the image above, these documentation categories are essential for new inductees and contractors to learn about the site. These will appear on the Documents tab for that particular site, published for contractors and entities to access.
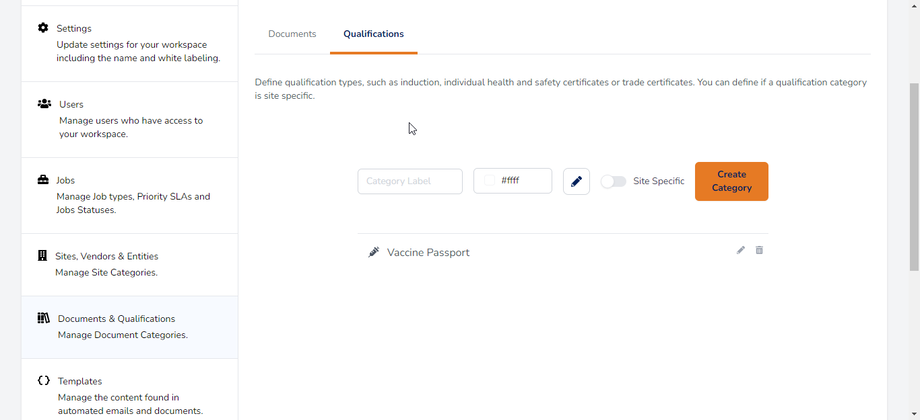 On the other hand, Qualification categories apply to your contacts. These qualifications will show if a particular contractor or individual has the certifications and training you need for a work site.
As shown in the image above, we have a qualification category for Vaccine Passports. You can find a separate tutorial for Documents and Qualifications here.
Adding Inductions
There are multiple ways to add Inductions. You can do so by going to Sites or Contacts
Via Sites
To Add a new induction, you can navigate and view sites. Click on the site, and you will redirect to the Site Record.
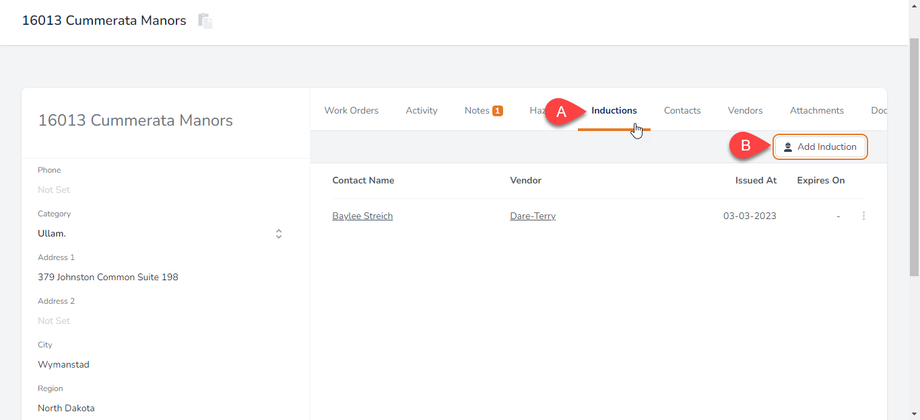 Click (a) on the Inductions Tab. Click the (b) “Add Induction” button, as shown in the image above.
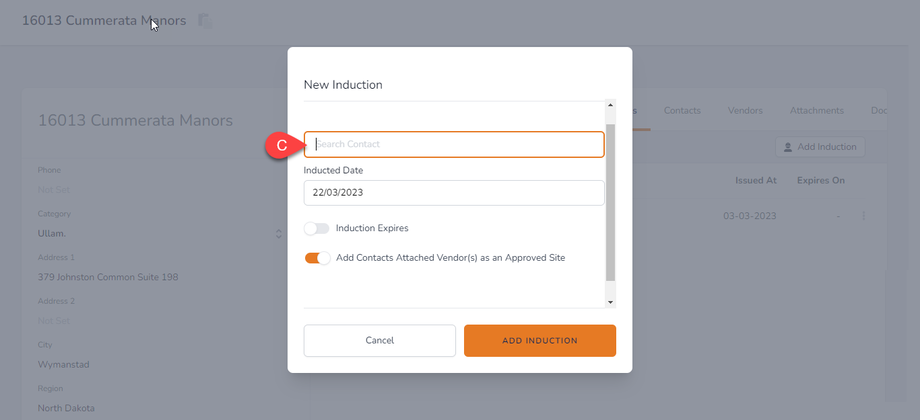
A new dialog box will appear. Search (c) for a contact attached to a business that is qualified for the role.
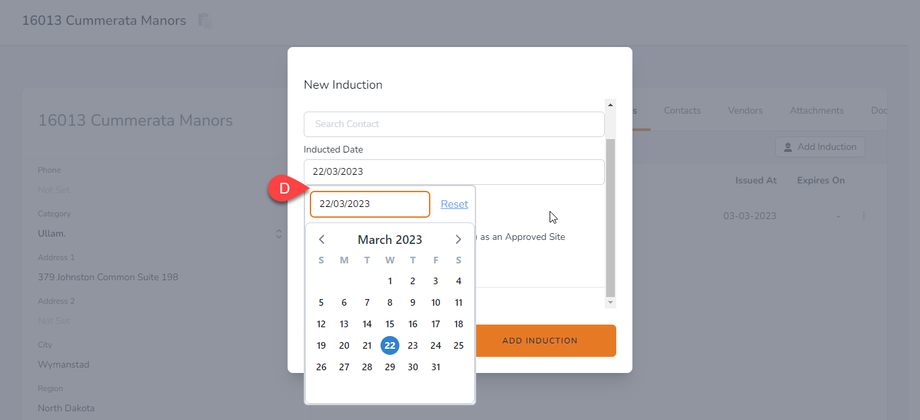
Click (d) the date when you plan to induct the contractor.
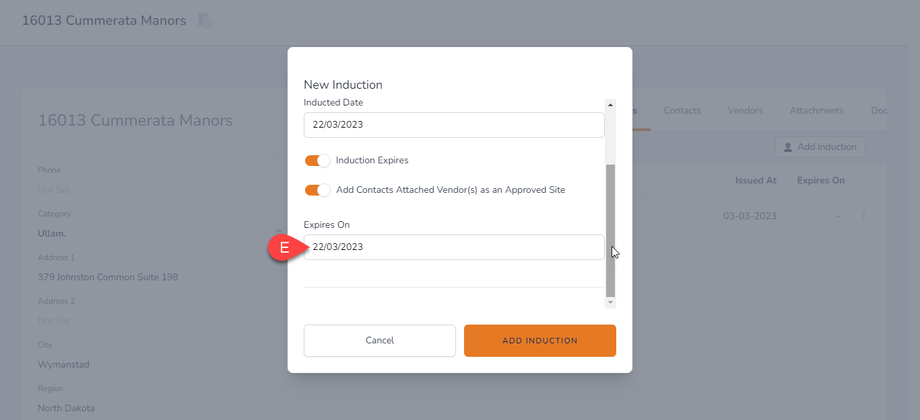 If you toggle on (e) the “Induction Expires” button, a new date field will appear, as shown above. Indicate when the induction will expire. Whilst this does not apply to all situations, some inductions will expire after some time, considering certifications, training, or other renewable documents or requirements.
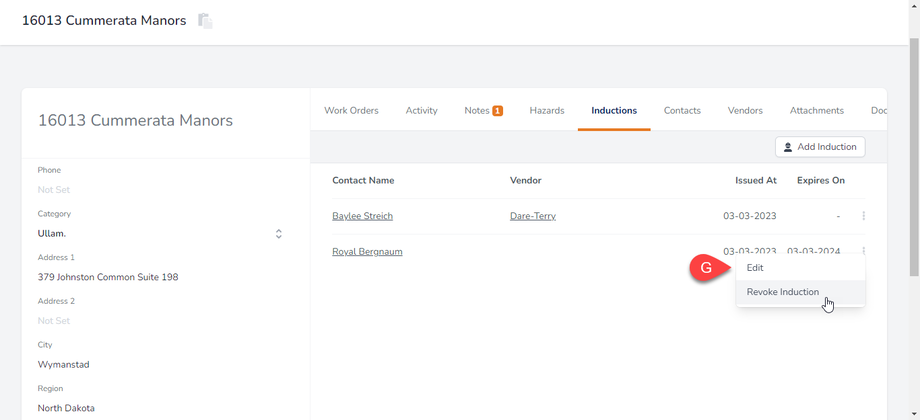
Once you’ve added the contacts, you’ll see them on the list in the image above. When clicking the kebab menu, two options will appear: Edit and Revoke Induction. You can (g) revoke the induction of a contractor if the contract is already done or has expired.
Via Contacts
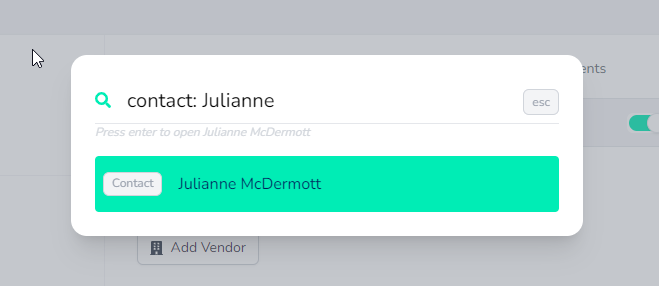
Alternatively, you could add a new induction through the contact itself. Use the Global Search to search for a specific contact with all the qualifications you need for the work order. Click the contact, and you will redirect to that contact’s record.
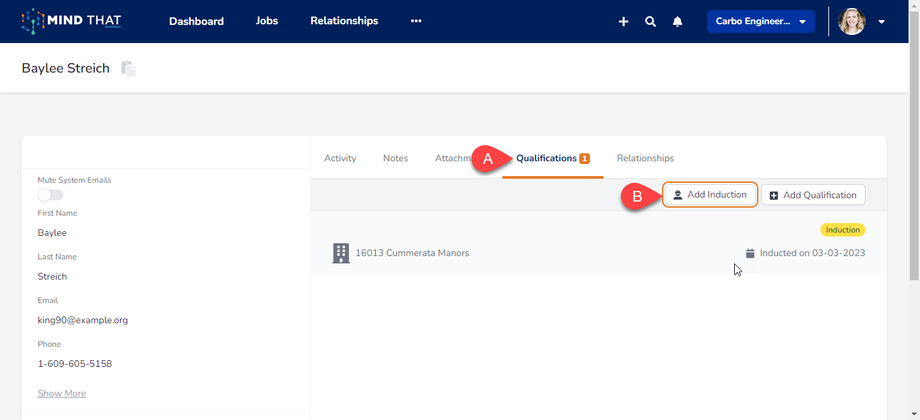
Look for the (a) Qualifications Tab and click. Click the (b) “Add Induction” button and a new dialogue box will appear. 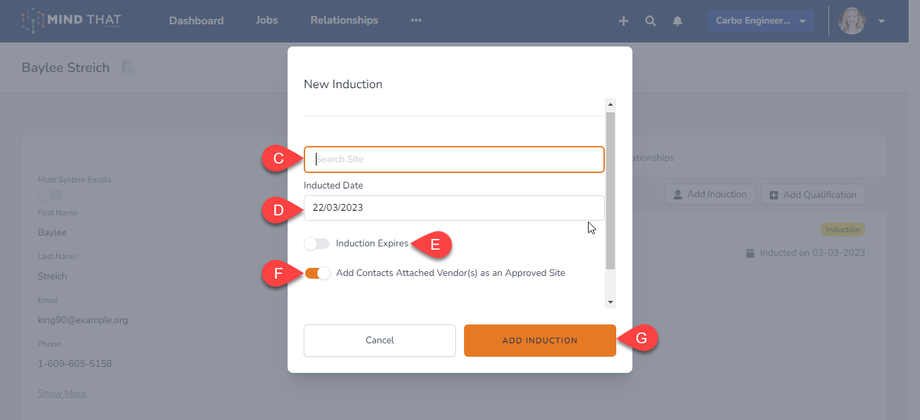
The first text field (c) will prompt you to type in the site where you want to induct the contact.
Next, indicate (d) when the induction date is for the contractor. Toggle on (e) the “Induction Expires” button if the induction has an expiration; otherwise, leave it as is.
You can also (f) toggle on/off the “Add Contacts’ Attached Vendor(s) as an Approved Site.”
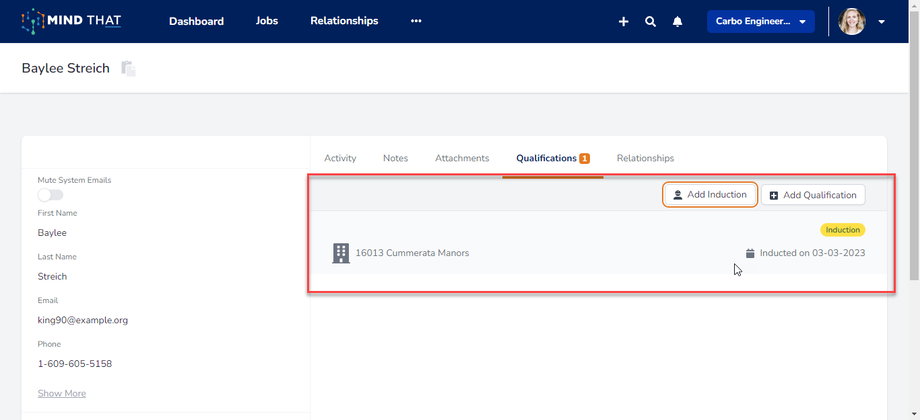
Once everything is set, you can (g) click “Add Induction.” The site will appear on the list of the Qualifications Tab, as shown in the image above.


