How to Navigate the Sites, Finding and Listing Sites
This guide provides instructions on navigating, viewing, and filtering sites in your Mind That account. It will cover topics such as accessing the Mind That dashboard, viewing Sites records and setting up filters to help you seamlessly navigate and manage your sites.
To access the Mind That Dashboard, open your web browser and navigate to the Mind That website. On the website, log in to your account.
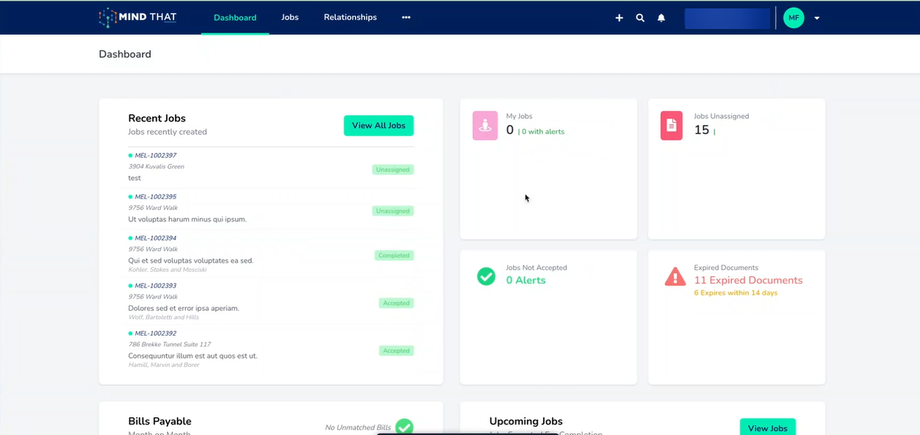
Logging in will redirect you to the Mind That Dashboard. The page will show a general overview of all recent jobs, upcoming jobs, bills, etc.
Finding Sites
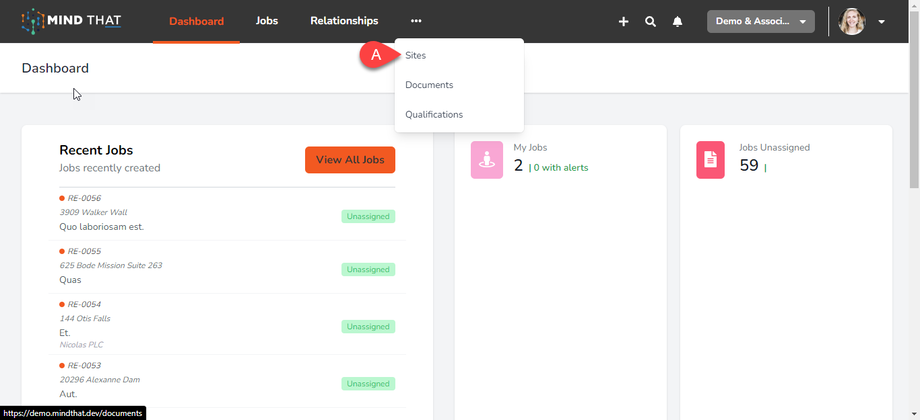
To view sites in the main dashboard, click (a) the ellipsis button beside the “Relationships” button.
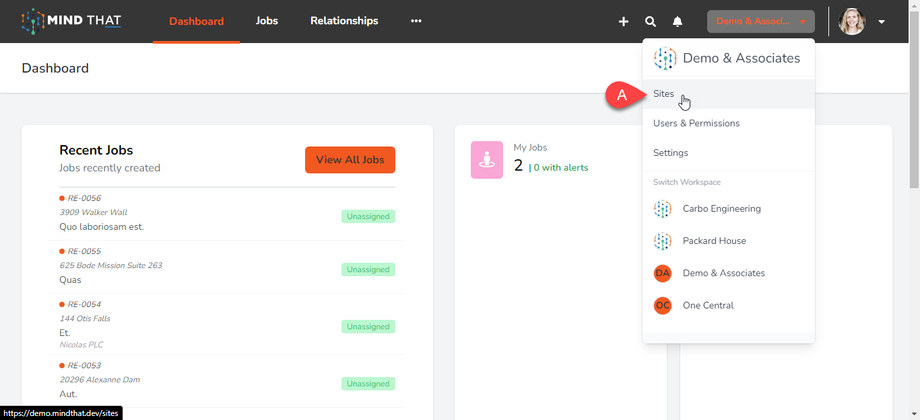
Alternatively, you can (a) click the workspace/company’s profile button, move your cursor on the “Sites” button and click. This will (b) redirect you to the Sites section, which lists all the available sites in the workspace.
All Sites Section
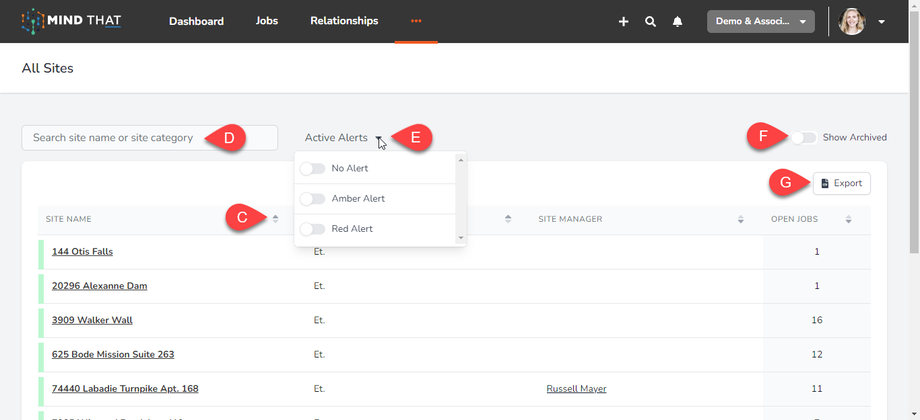
In this section are all the sites listed in the workspace. All sites are arranged according to Site Name, Site Categories, Site Manager and Open Jobs. To (c) change the order of the Sites, you can click the Ascending/Descending button.
You can use (d) the Site search bar or the Global Search function to search for a specific site. (To learn how to use Global Search, see this tutorial.)
You can further filter Sites according to Active Alerts. Click (e) on the drop-down button beside it and you can toggle on/off the alerts.
To show archived sites, you can (f) toggle on the “Show Archived” button on the right side of the section. You can save the Sites list as a .csv file by (g) clicking the “Export” button.
Sites
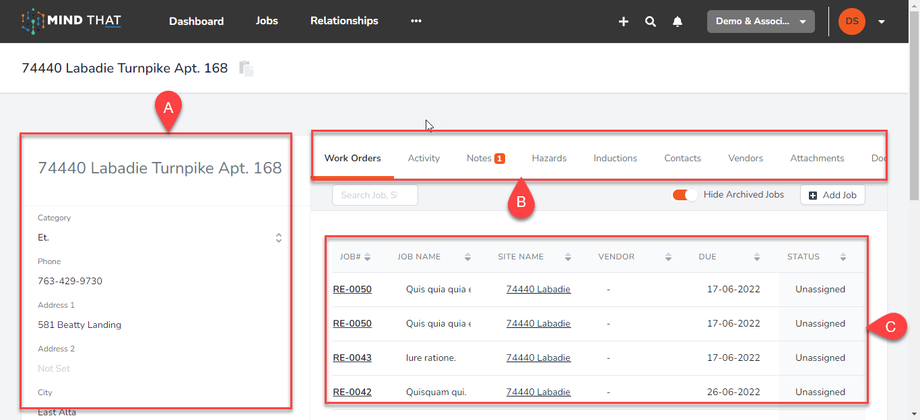
Clicking on a particular site will show all the records for that specific site. The (a) left sidebar will include all the details on that specific site, such as the addresses, cities, site manager, email, etc. The(b) right side of the Site section will contain the Work Orders, Activity, Jobs, etc. The (c) tabulated list shows all the jobs under that particular site. The information on this sidebar is all editable. Let’s look at each of these aspects on the Site Records.
Work Orders
The first tab on the Site Records is Work Orders. These work orders are the company’s/workspace’s answer to a particular job.
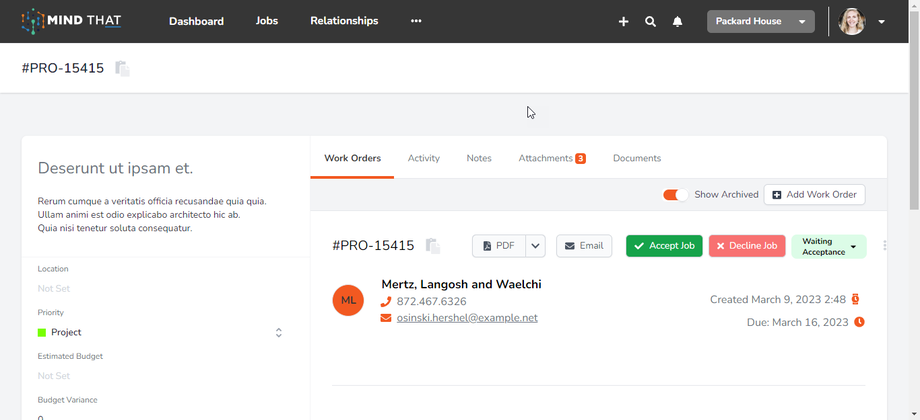
If the job entails, say, an aircon repair, you can click on that job. You will redirect to a new section where you can assign an electrician, aircon specialist, or any other vendor that fits the job type to accept the work order.
Activity
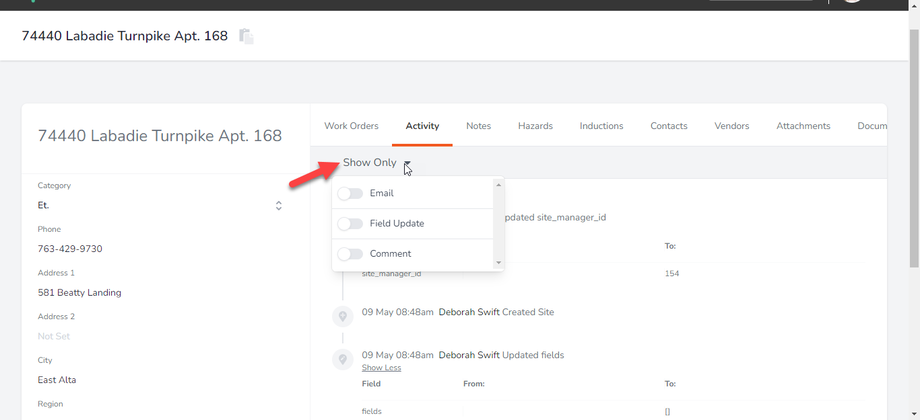
The next tab will show all the activities under the Site section. In this example, we’re looking at an account/workspace manager adding fields and creating a new site. This section is for auditing purposes, showing the time and date when an account manager or member did a specific activity.
You can also click on the “Show Only” drop-down button to filter out what activities or updates you may want to see.
Notes
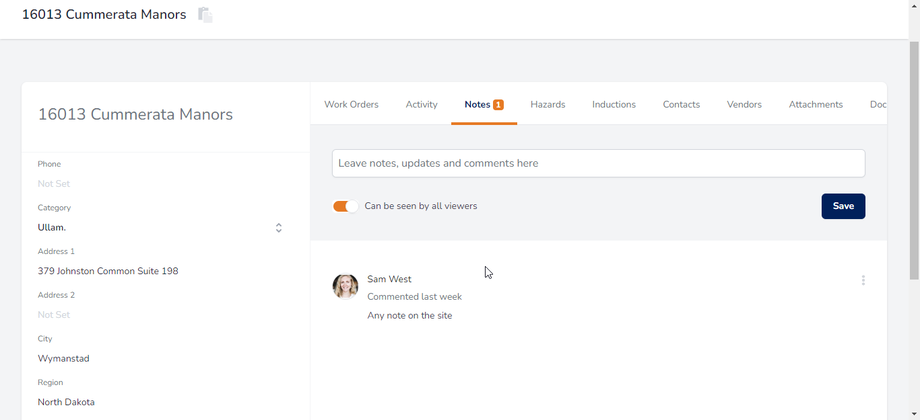
As the name implies, the notes tab will allow you to leave updates, comments, or notes about anything related to the site. All members, managers, employers, etc., can view the conversation when you toggle on the “Can be seen by all viewers” button. Type in your notes on the text field and click “Save” when done.
Hazards
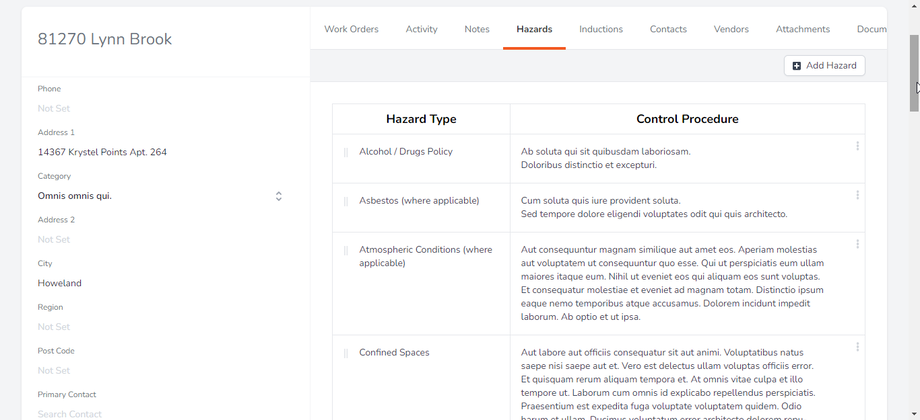
This section will show all the hazards associated with this site or sub-station. See the Hazard tutorial for more information.
Inductions
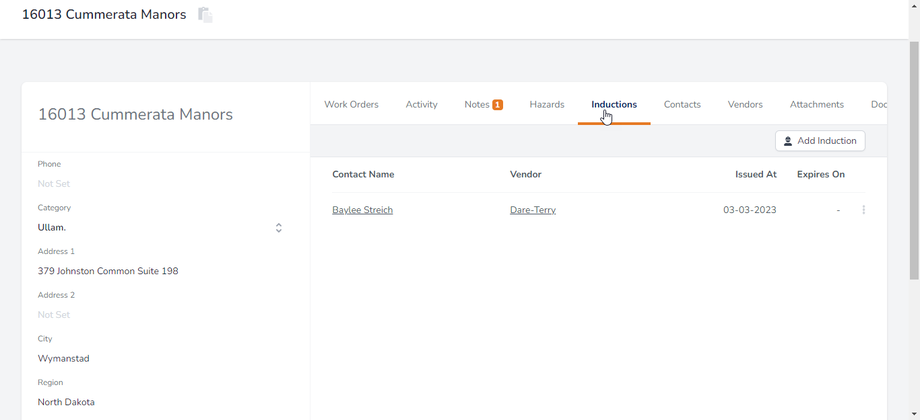
The Induction tab will show contractors that have reached a certain level of qualification/s to tackle the work orders for that particular site. Only contractors that are appropriately inducted or informed of the hazards and other pertinent job details will show on this tab.
For further details on this section, see the Inductions Tutorial.
Contacts
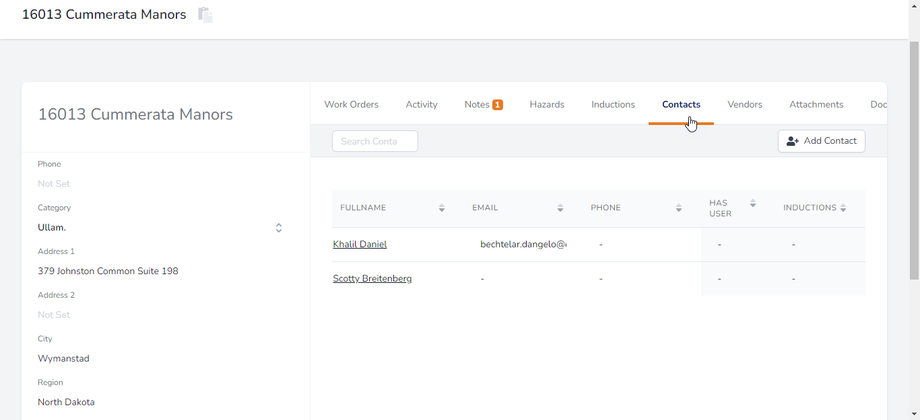
This tab will allow you to save any contacts that may be relevant for that particular site or work order.
Vendors
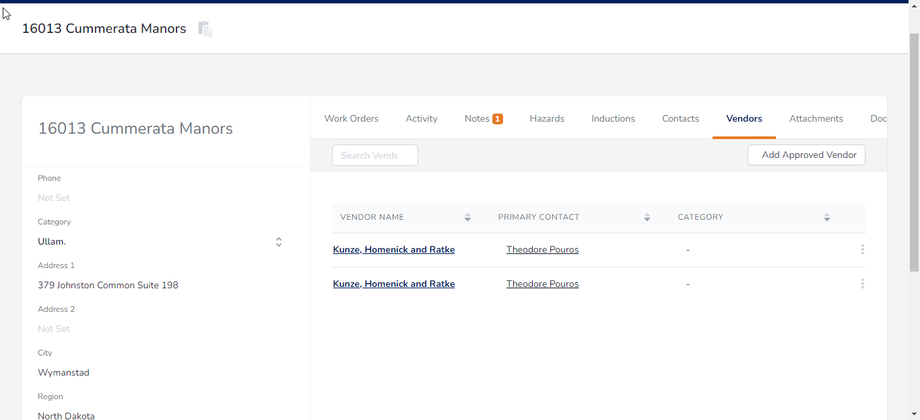
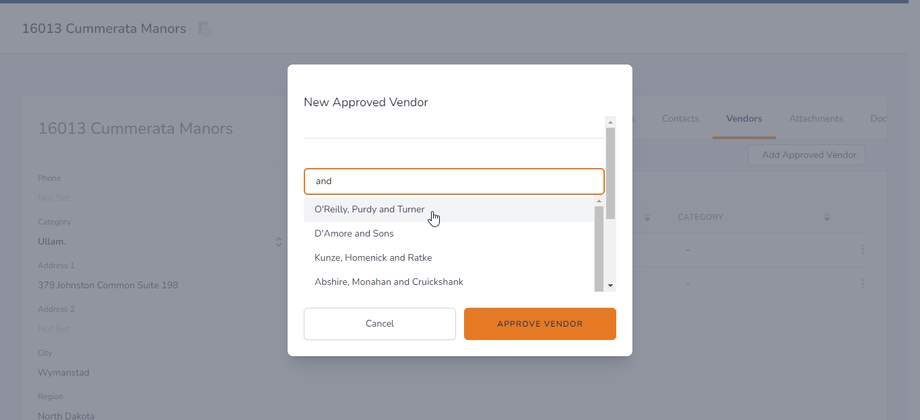
The Vendor tab will show you the approved/preferred vendors adequately inducted to tackle this site. If you want to endorse a vendor, click the “Add Approved Vendor” button.
A search bar will appear, allowing you to type in any vendor that comes to mind, provided they are qualified.
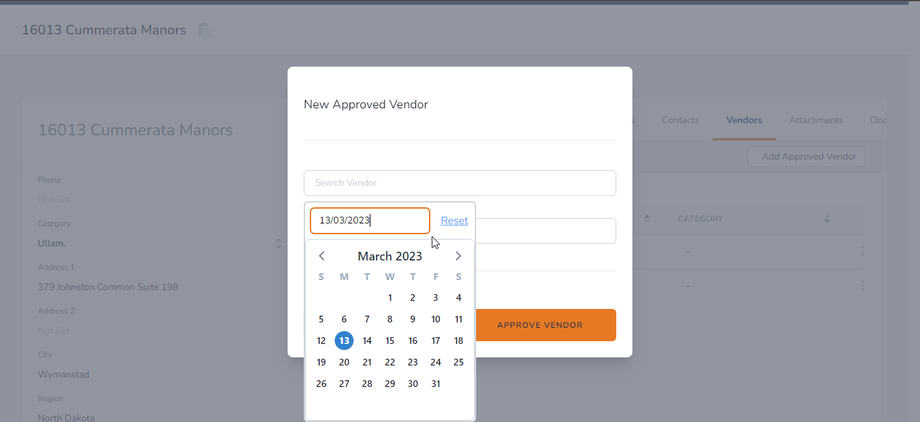
You can also edit the approval date as shown above.
Attachments
The attachments tab will allow you to upload any relevant file from your desktop to the site. This may include legal documents, images or any other relevant information about that particular job site.
Documents
This tab will allow you to upload any file relevant to the site, similar to attachments. The main difference is that you can track documents and they expire over time.
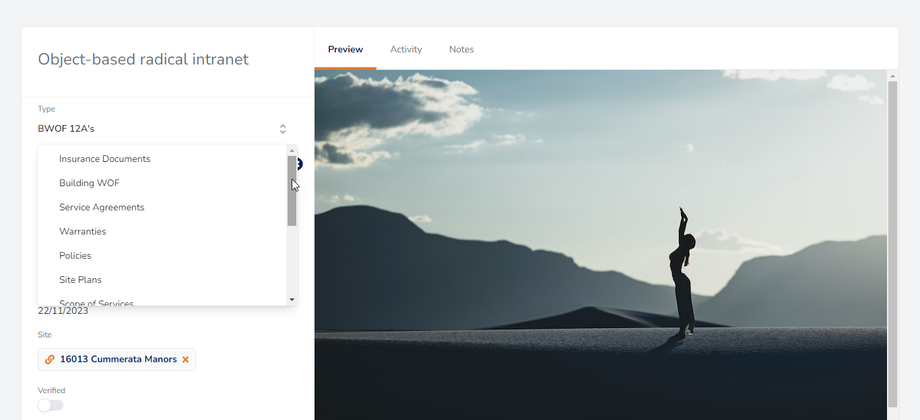
You can assign the document type by clicking on the drop-down button. Examples of document types include policies, warranties, legalities, hazards, insurance, etc.
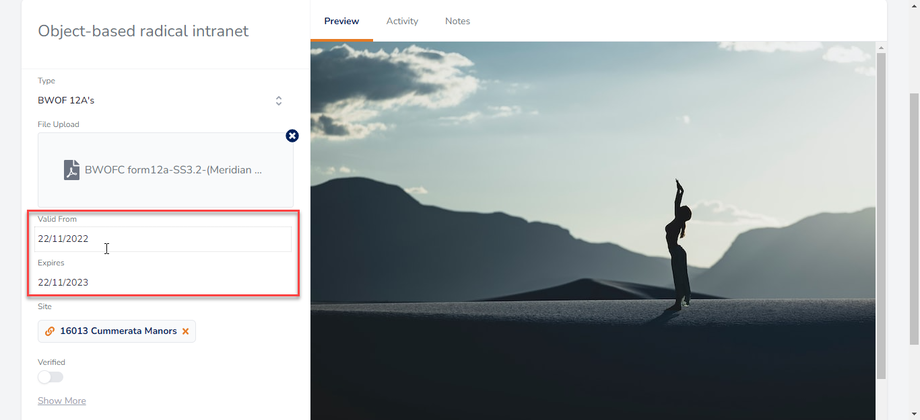
As shown in the example above, you can assign the validity dates.
The document tabs also allow you to preview the file, track the activities and see notes or comments about that particular document.


